Using Server-Sent Events (SSE) to stream LLM responses in Next.js

AI-powered applications that respond quickly enhance the user experience by making them feel heard and seen, instantly. With streaming, you can create such chatbots that instantly address queries or deliver personalized recommendations in real-time. It's not just about speed—it's about meeting user needs promptly, enhancing its perceived worth.
Streaming involves sending data in small, continuous chunks rather than in one large block. In the context of AI applications, like chatbots or recommendation systems, streaming means sending partial responses to users as soon as they're available, instead of waiting to compile and deliver the entire response at once. This approach ensures that users receive immediate feedback or information, creating a more dynamic and responsive user experience.
In this guide, you will learn how to leverage Server-Sent Events (SSE) to implement streaming in Next.js endpoints with LangChain and OpenAI's language models. Further, you will learn how to cache the streaming responses with Upstash.
Prerequisites
You will need the following:
- Node.js 18 or later
- An OpenAI account
- An Upstash account
- A Vercel account
Tech Stack
| Technology | Description |
|---|---|
| Upstash | Serverless database platform. You are going to use Upstash Redis to cache OpenAI API responses. |
| OpenAI | An artificial intelligence research lab focused on developing advanced AI technologies. |
| LangChain | Framework for developing applications powered by language models. |
| Next.js | The React Framework for the Web. |
| Vercel | A cloud platform for deploying and scaling web applications. |
Generate an OpenAI Token
Using OpenAI API, you are able to create chatbot responses using AI. Any request to OpenAI API requires an authorization token. To obtain the token, navigate to the API Keys in your OpenAI account, and click the Create new secret key button. Copy and securely store this token for later use as OPENAI_API_KEY environment variable.
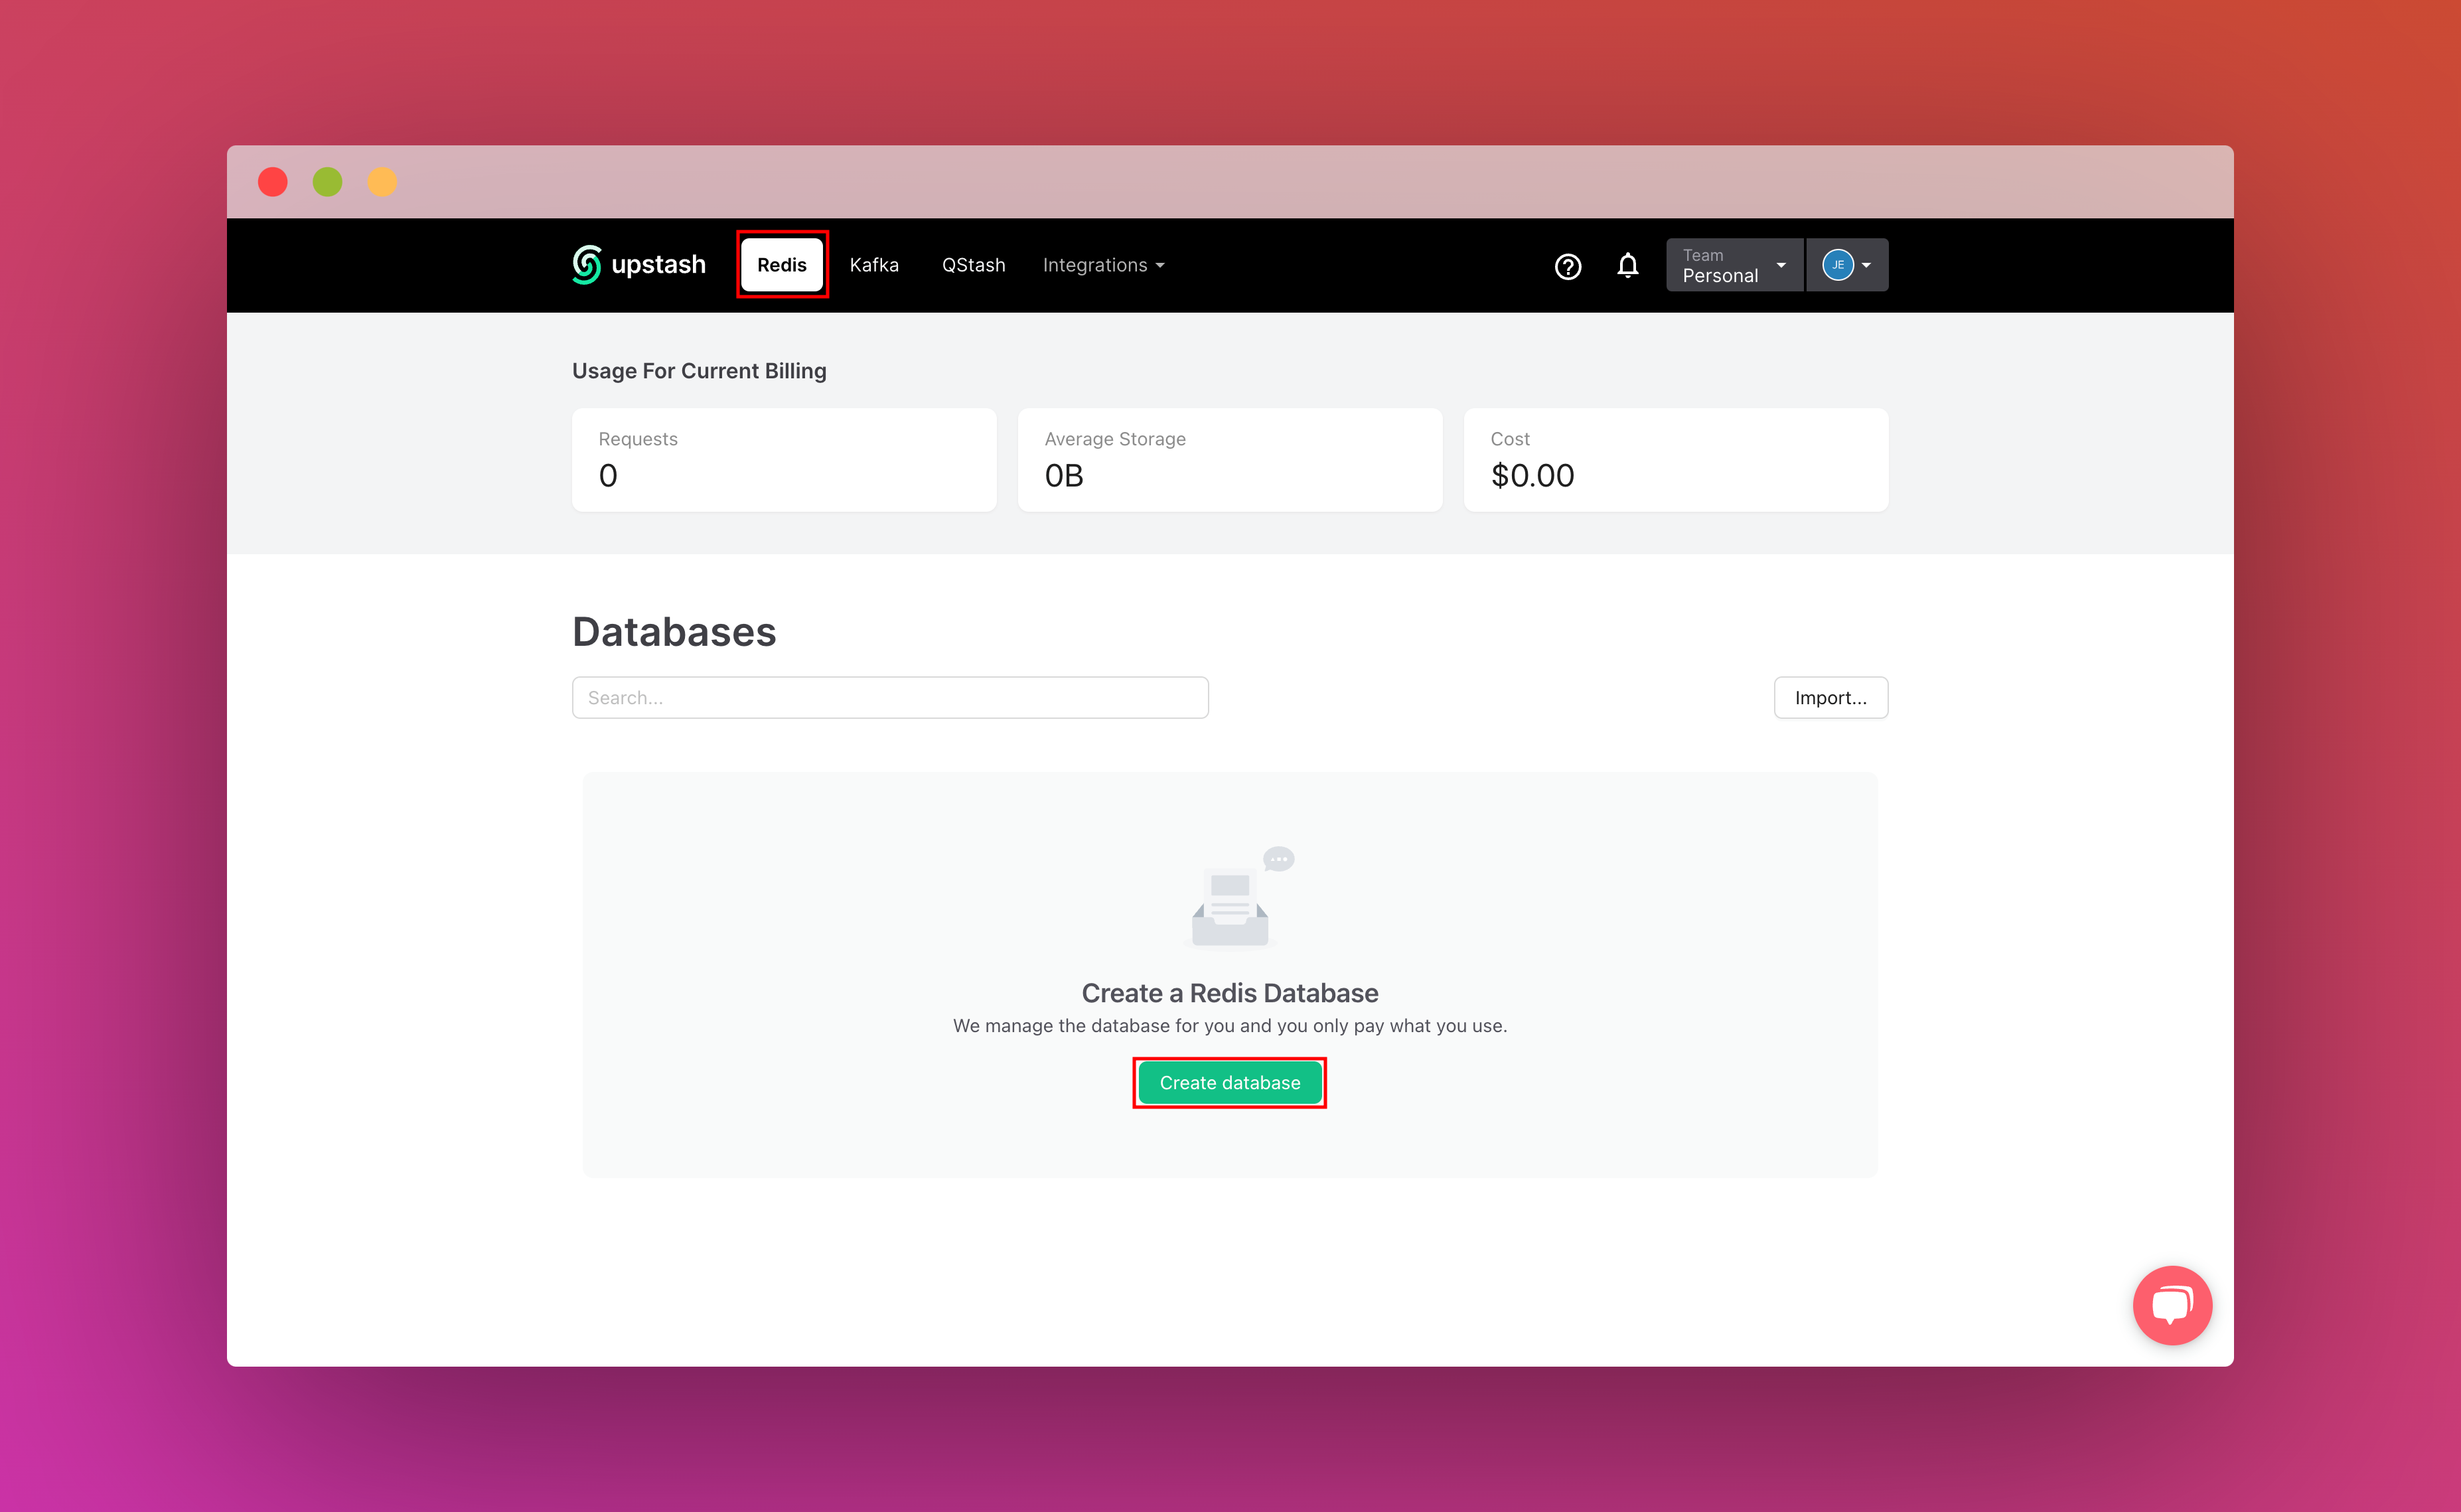
Setting up Upstash Redis
Once you have created an Upstash account and are logged in you are going to go to the Redis tab and create a database.

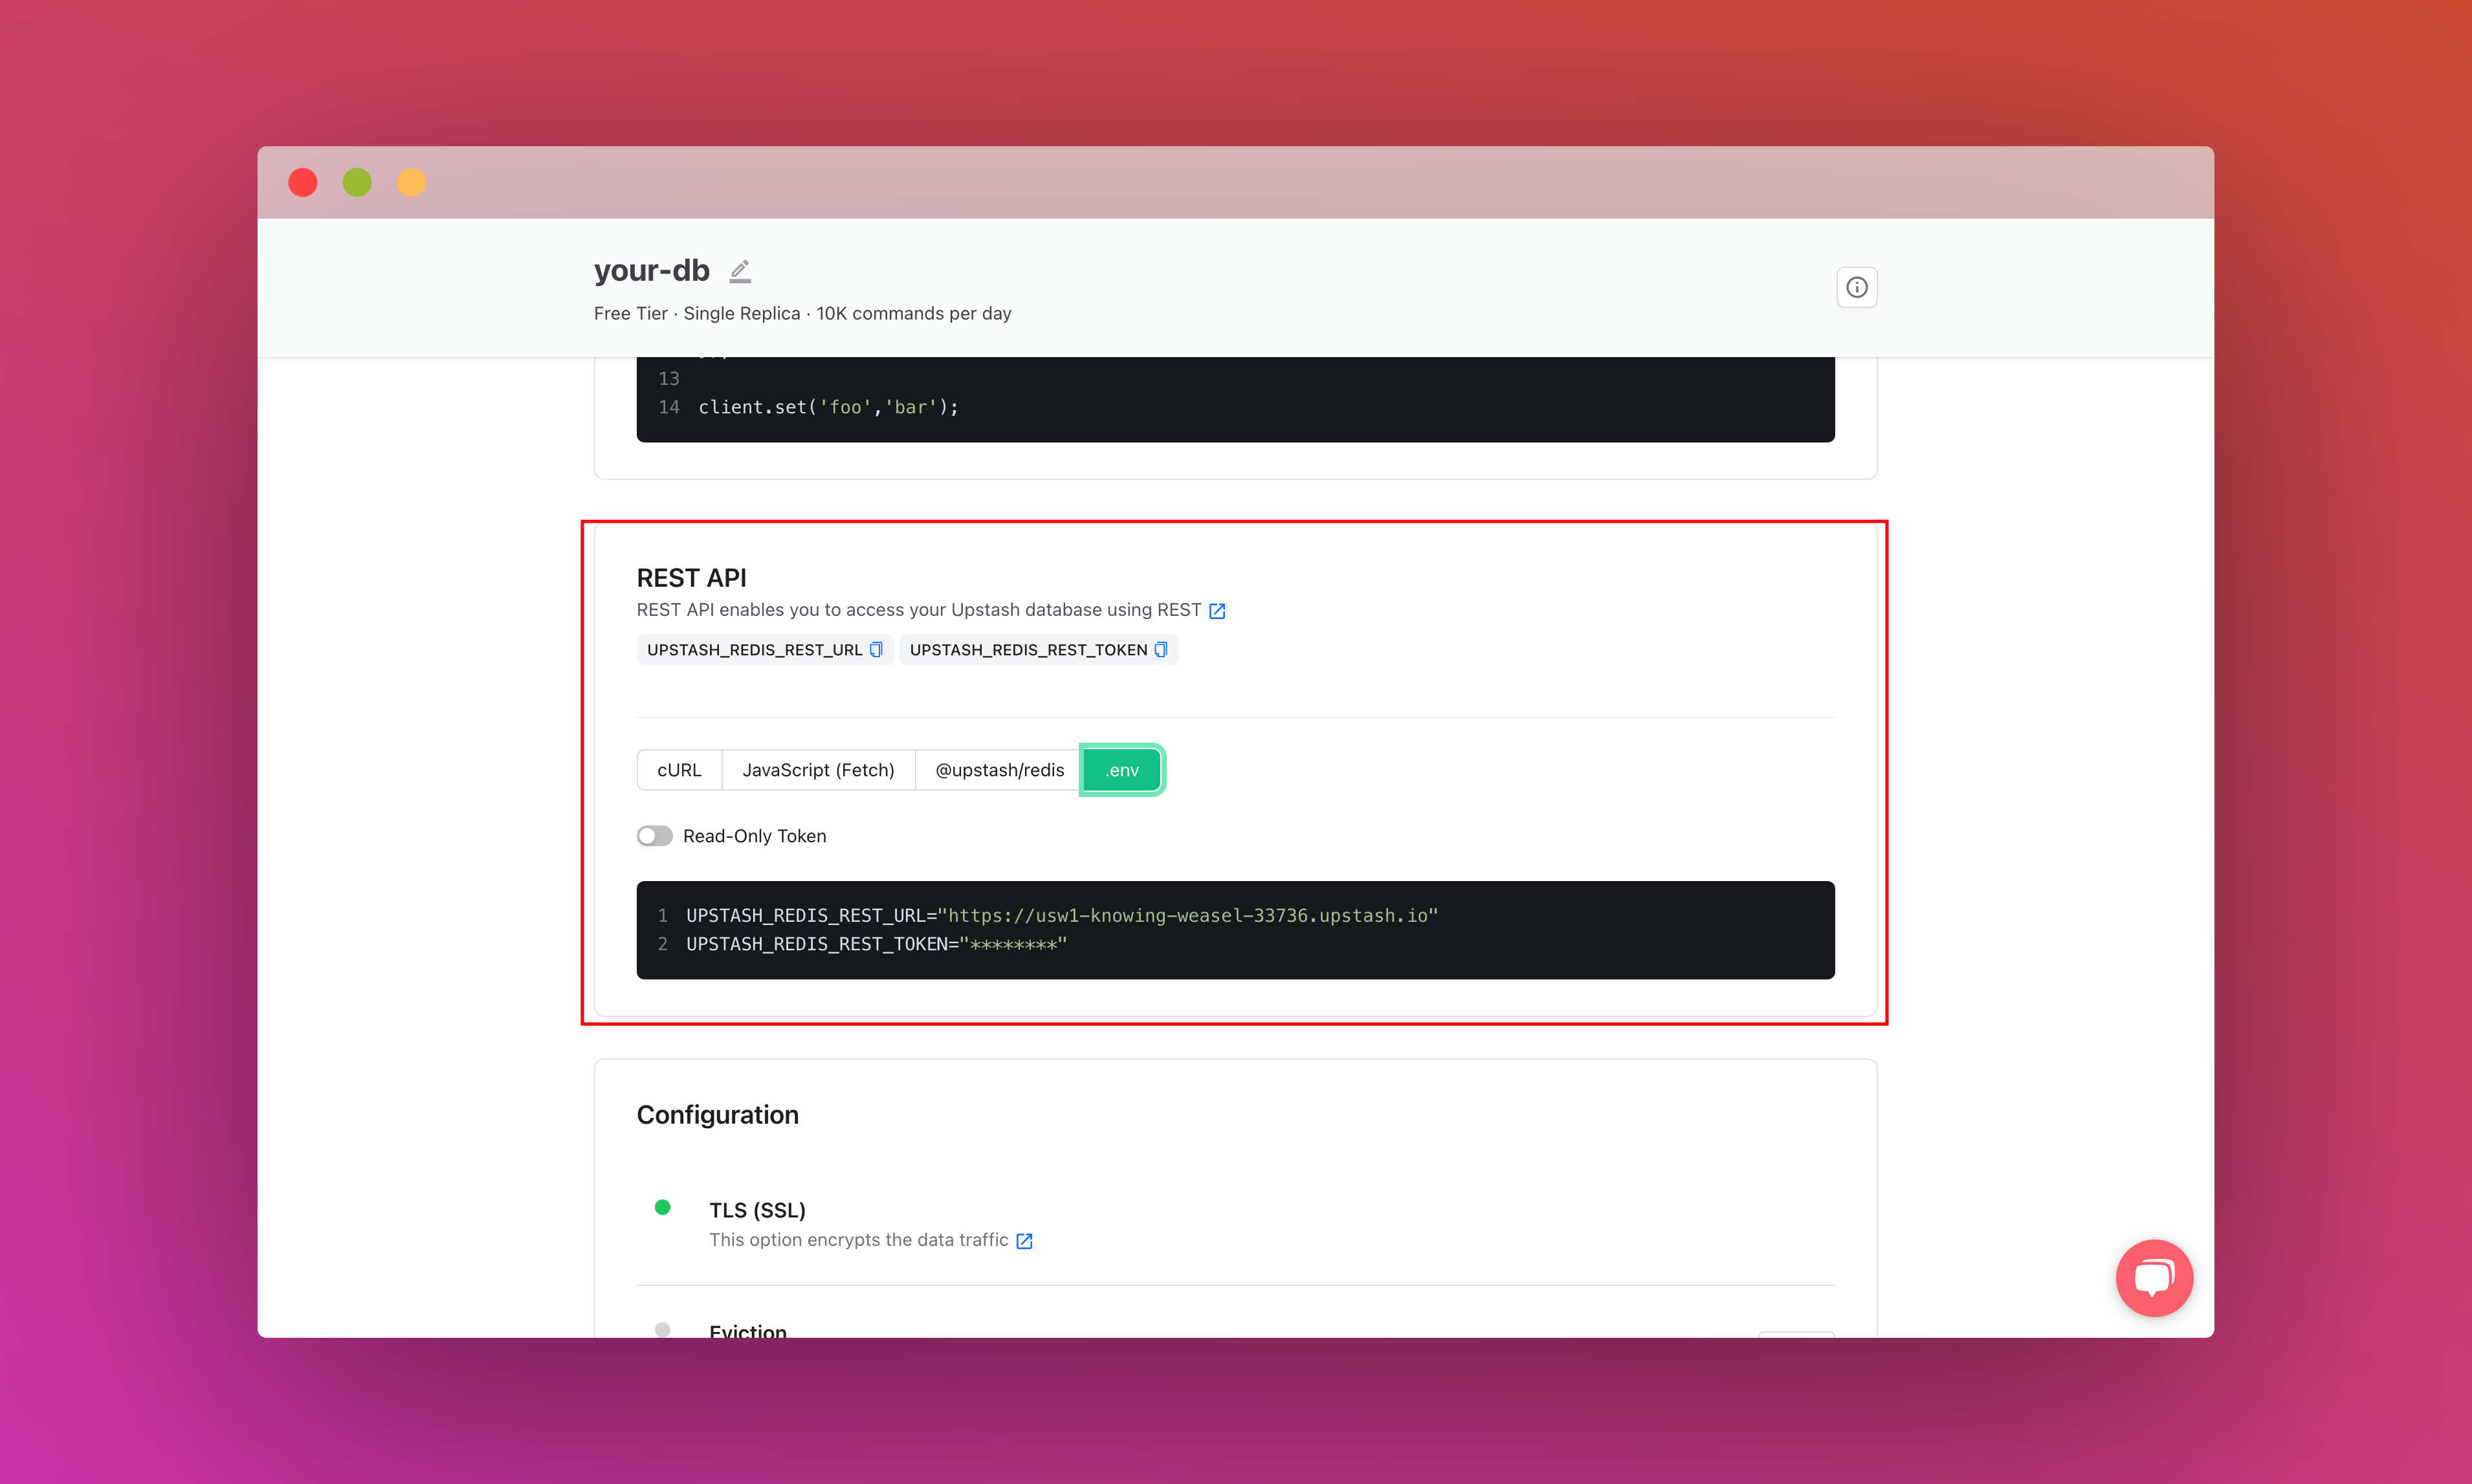
Scroll down until you find the REST API section and select the .env button. Copy the content and save it somewhere safe.
Create a new Next.js application
Let’s get started by creating a new Next.js project. Open your terminal and run the following command:
npx create-next-app@latest my-appWhen prompted, choose:
Yeswhen prompted to use TypeScript.Nowhen prompted to use ESLint.Yeswhen prompted to use Tailwind CSS.Nowhen prompted to usesrc/directory.Yeswhen prompted to use App Router.Nowhen prompted to customize the default import alias (@/*).
Once that is done, move into the project directory and start the app in developement mode by executing the following command:
cd my-app
npm run dev
The app should be running on localhost:3000. Stop the development server to install LangChain dependencies in the application by executing the following command:
npm install @langchain/openai @langchain/communityThe command installed the following library:
@langchain/openai: A LangChain package to interface with the OpenAI series of models.@langchain/community: A collection of third party integrations for plug-n-play with LangChain core.
Now, create a .env file at the root of your project. You are going to add the OPENAI_API_KEY you obtained earlier.
It should look something like this:
# .env

# OpenAI Environment Variable
OPENAI_API_KEY="..."

# Upstash Redis Environment Variables
UPSTASH_REDIS_REST_URL="..."
UPSTASH_REDIS_REST_TOKEN="..."
To create API endpoints in Next.js, you will use Next.js Route Handlers which allow you to serve responses over Web Request and Response APIs. To start creating an API route in Next.js that streams responses to the user, execute the following command:
mkdir -p app/api/stream/completion/chat
mkdir app/lib
The -p flag creates parent directories for the chat directory if they're missing.
This sets up our Next.js project. Now, let's move on to creating a cache handler with Upstash.
Instantiate an Upstash Redis Cache Client
With UpstashRedisCache class, you can initialize a Redis cache client for caching OpenAI API responses within a few lines of code. Create a file upstashCache.tsx inside the app/lib directory:
// File: app/lib/upstashCache.tsx

import { UpstashRedisCache } from "@langchain/community/caches/upstash_redis";

// See https://docs.upstash.com/redis/howto/connectwithupstashredis#quick-start for connection options
export default new UpstashRedisCache({
  config: {
    url: process.env.UPSTASH_REDIS_REST_URL,
    token: process.env.UPSTASH_REDIS_REST_TOKEN,
  },
});
Using the cache handler, it becomes super easy to cache the conversations or completion responses generated by OpenAI API. Let's move on to understand how you can start using Server-Sent Events in Next.js.
Creating Server-Sent Events API in Next.js App Router
Server-Sent Events (SSE) allow you to deliver real-time data updates from the server to the client without the need for continuous polling. SSE enables a unidirectional flow of data over a single, long-lived HTTP connection.
Create a file named route.ts with the following code in the app/api/stream directory to understand the minimal setup required to stream responses using Server-Sent Events:
// File: app/api/stream/route.ts

// Prevents this route's response from being cached on Vercel
export const dynamic = "force-dynamic";

export async function POST(request: Request) {
  const encoder = new TextEncoder()
  // Create a streaming response
  const customReadable = new ReadableStream({
    start(controller) {
      const message = "A sample message."
      controller.enqueue(encoder.encode(`data: ${message}\n\n`))
    },
  })
  // Return the stream response and keep the connection alive
  return new Response(customReadable, {
    // Set the headers for Server-Sent Events (SSE)
    headers: {
      Connection: "keep-alive",
      "Content-Encoding": "none",
      "Cache-Control": "no-cache, no-transform",
      "Content-Type": "text/event-stream; charset=utf-8",
    },
  })
}
The code above does the following:
- The dynamic constant is set to
force-dynamic, preventing caching of responses on the Vercel platform. This ensures that each request for the SSE stream gets fresh data and is not served from cache. - A
ReadableStreamis created to generate a stream of data to be sent to the client. In the start method of the stream, a message is encoded and enqueued into the stream's controller. This message will be sent to the client as part of the SSE stream. - The
Responseobject is created with headers specific to Server-Sent Events. These headers include the following:Connection: keep-aliveto maintain the connection open for streaming.Cache-Control: no-cache, no-transformto prevent caching in browser.Content-Type: text/event-stream; charset=utf-8to specify the content type as Server-Sent Events.
- The Response object containing the custom ReadableStream is returned from the endpoint. This response will be sent to clients requesting the SSE stream.
With this, you have created an endpoint that is able to stream responses. In the next sections, you will understand how you can stream Completion and Chat Completion API responses from OpenAI with LangChain callbacks.
Streaming OpenAI Completion API responses with LangChain Callbacks
The OpenAI Completion API provides a powerful tool for generating text based on given prompt(s), useful in various real-life scenarios such as content generation and language translation. Integrating LangChain callbacks enables real-time streaming of responses, increasing perceived responsiveness in applications.
Create a file named completionModel.tsx in app/lib directory, defining a function which initializes an OpenAI instance with streaming enabled and LangChain callbacks, generating text in real-time.
// File: app/lib/completionModel.tsx

import { OpenAI } from "@langchain/openai";

export const completionModel = (
  controller: ReadableStreamDefaultController,
  encoder: TextEncoder
) =>
  new OpenAI({
    streaming: true,
    callbacks: [
      {
        handleLLMNewToken(token) {
          controller.enqueue(encoder.encode(`data: ${token}\n\n`));
        },
        async handleLLMEnd(output) {
          controller.close();
        },
      },
    ],
  });
The code above does the following:
- Imports the
OpenAIclass from the@langchain/openaipackage. - Exports a function named
completionModelwhich takes two parameters:- controller: A
ReadableStreamDefaultControllerobject which allows you to enqueue messages into the stream. - encoder: A
TextEncoderobject that encodes the messages intoUint8Arrayobject.
- controller: A
- Creates a new instance of the
OpenAIclass with the following configuration options:streaming: Set to true, indicating that the API should return streaming responses.callbacks: An array containing a single object with two callback functions, used to intercept response creation by LLM at each stage.
handleLLMNewToken: A callback invoked when a new token is generated by the language model. It enqueues the encoded token to the controller.handleLLMEnd: An asynchronous callback invoked when the language model generation is complete. It closes the controller.
Further, create a file named route.ts with the following code in the app/api/stream/completion directory. The changes from the initial streaming route handler that you created have been higlighted below:
// File: app/api/stream/completion/route.ts

// Prevents this route's response from being cached on Vercel
export const dynamic = "force-dynamic";

+ import { completionModel } from "@/app/lib/completionModel";

export async function POST(request: Request) {
+  // Obtain the user message from request's body
+  const { message } = await request.json();
  const encoder = new TextEncoder();
  // Create a streaming response
  const customReadable = new ReadableStream({
    async start(controller) {
+      // Generate a streaming response from OpenAI with LangChain
+      await completionModel(controller, encoder).invoke(message);
    },
  });
  // Return the stream response and keep the connection alive
  return new Response(customReadable, {
    // Set the headers for Server-Sent Events (SSE)
    headers: {
      Connection: "keep-alive",
      "Content-Encoding": "none",
      "Cache-Control": "no-cache, no-transform",
      "Content-Type": "text/event-stream; charset=utf-8",
    },
  });
}
Apart from what you did earlier to create a streaming endpoint in Next.js, the code additions above do the following:
- Imports the
completionModelfunction. - Extracts user message from the request body using
request.json(). - Inside the
startmethod of the ReadableStream, thecompletionModelfunction is invoked asynchronously with the message obtained from the request. This function generates a streaming response from OpenAI with LangChain.
To cache user queries and their responses with Upstash, import the Upstash Redis cache client into the completionModel function as follows:
import { OpenAI } from "@langchain/openai";
+ import cache from '@/app/lib/upstashCache';

export const completionModel = (
  controller: ReadableStreamDefaultController,
  encoder: TextEncoder
) =>
  new OpenAI({
+   cache,
    streaming: true,
    temperature: 0.9,
    callbacks: [
      {
        handleLLMNewToken(token) {
          controller.enqueue(encoder.encode(token));
        },
        async handleLLMEnd(output) {
          console.log(output.generations[0][0].text);
          controller.close();
        },
      },
    ],
  });
With minimal changes, you have enabled caching of the OpenAI Completion API responses with Upstash.
Now, let's move on to learning how OpenAI Chat Completion API responses can be streamed in Next.js endpoints.
Streaming OpenAI Chat Completion API responses with LangChain Callbacks
The OpenAI Chat Completion API provides a powerful tool for generating real-time conversational responses based on provided messages. The applications span from building chatbots capable of engaging in natural dialogues to enhancing customer support systems with AI-driven interaction capabilities. It enables developers to create dynamic and responsive conversational interfaces.
Create a file named chatCompletionModel.tsx in app/lib directory, defining a chatCompletionModel function which creates a streaming interface for OpenAI's Chat Completion API with LangChain callbacks, facilitating real-time conversation generation based on provided messages.
// File: app/lib/chatCompletionModel.tsx

import { ChatOpenAI } from "@langchain/openai";

export type ConversationMessage = {
  role: string;
  content: string;
};

export type ConversationMessages = ConversationMessage[];

export const chatCompletionModel = (
  controller: ReadableStreamDefaultController,
  encoder: TextEncoder
) =>
  new ChatOpenAI({
    streaming: true,
    callbacks: [
      {
        handleLLMNewToken(token) {
          controller.enqueue(encoder.encode(`data: ${token}\n\n`));
        },
        async handleLLMEnd(output) {
          controller.close();
        },
      },
    ],
  });
The code above does the following:
- Imports the
ChatOpenAIclass from the@langchain/openaipackage. - Creates the following type definitions:
ConversationMessage: Defines a type for a single message in a conversation. It contains two properties: role (indicating the role of the sender) and content (the message content).ConversationMessages: Defines a type for an array of conversation messages.
- Exports a function named
chatCompletionModelwhich takes two parameters:- controller: A
ReadableStreamDefaultControllerobject which allows you to enqueue messages into the stream. - encoder: A
TextEncoderobject that encodes the messages intoUint8Arrayobject.
- controller: A
- Creates a new instance of the
ChatOpenAIclass with the following configuration options:streaming: Set to true, indicating that the API should return streaming responses.callbacks: An array containing a single object with two callback functions, used to intercept response creation by LLM at each stage.
handleLLMNewToken: A callback invoked when a new token is generated by the language model. It enqueues the encoded token to the controller.handleLLMEnd: An asynchronous callback invoked when the language model generation is complete. It closes the controller.
Further, create a file named route.ts with the following code in the app/api/stream/completion/chat directory. The changes from the initial streaming route handler that you created have been higlighted below:
// File: app/api/stream/completion/chat/route.ts

// Prevents this route's response from being cached on Vercel
export const dynamic = "force-dynamic";

+ import {
+   type ConversationMessage,
+   chatCompletionModel,
+ } from "@/app/lib/chatCompletionModel";

export async function POST(request: Request) {
+   // Obtain the conversation messages from request's body
+   const { messages = [] } = await request.json();
  const encoder = new TextEncoder();
  // Create a streaming response
  const customReadable = new ReadableStream({
    async start(controller) {
+       // Generate a streaming response from OpenAI with LangChain
+       await chatCompletionModel(controller, encoder).invoke(
+         messages.map((i: ConversationMessage) => [i["role"], i["content"]])
+       );
    },
  });
  // Return the stream response and keep the connection alive
  return new Response(customReadable, {
    // Set the headers for Server-Sent Events (SSE)
    headers: {
      Connection: "keep-alive",
      "Content-Encoding": "none",
      "Cache-Control": "no-cache, no-transform",
      "Content-Type": "text/event-stream; charset=utf-8",
    },
  });
}
Apart from what you did earlier to create a streaming endpoint in Next.js, the code additions above do the following:
- Imports the
chatCompletionModelfunction andConversationMessagetype definition. - Extracts the messages in conversation from the request body using
request.json(). - Inside the
startmethod of the ReadableStream, thechatCompletionModelfunction is invoked asynchronously after transformed messages array. Each message is transformed into an array containing the role and content of the message. This function generates a streaming response from OpenAI with LangChain.
To cache the chat history with Upstash, import the Upstash Redis cache client into the chatCompletionModel function as follows:
+ import cache from '@/app/lib/upstashCache';
import { ChatOpenAI } from "@langchain/openai";

export type ConversationMessage = {
  role: string;
  content: string;
};

export type ConversationMessages = ConversationMessage[];

export const chatCompletionModel = (
  controller: ReadableStreamDefaultController,
  encoder: TextEncoder
) =>
  new ChatOpenAI({
+   cache,
    streaming: true,
    temperature: 0.9,
    callbacks: [
      {
        handleLLMNewToken(token) {
          controller.enqueue(encoder.encode(token));
        },
        async handleLLMEnd(output) {
          console.log(output.generations[0][0].text);
          controller.close();
        },
      },
    ],
  });
With minimal changes, you have enabled caching of the entire chat history with Upstash.
Now, let's move on to creating the client side React components to consume the streaming endpoints.
Setup Next.js frontend to listen to Server-Sent Events
In this section, you will learn how to setup a minimal listener to Server-Sent Events API messages, and an approach to manage the state of messages exchanged between user and AI.
Listening to Server-Sent Events API in React
To listen to SSE API in our client-side component in React, you are going to initiate a POST request to the specified API route. Upon receiving a response, you would decode the incoming data as a string using TextDecoderStream method, and continuously read the data from stream.
"use client";

export default function () {

  const obtainAPIResponse = async (apiRoute: string, apiData: any) => {
    // Initiate the first call to connect to SSE API
    const apiResponse = await fetch(apiRoute, {
      method: "POST",
      headers: {
        "Content-Type": "text/event-stream",
      },
      body: JSON.stringify(apiData),
    });

    if (!apiResponse.body) return;

    // To decode incoming data as a string
    const reader = apiResponse.body
      .pipeThrough(new TextDecoderStream())
      .getReader();

    while (true) {
      const { value, done } = await reader.read();
      if (done) {
        break;
      }
      if (value) {
        // Do something
      }
    }
  };

  return <></>
}
Managing state of the conversation in React
To manage the state of the conversation between the user and chatbot, you can use state variables. You would update the state variables messages and latestMessage to store the conversation history and the latest message, respectively. By updating these state variables within the loop that processes incoming data from the SSE API, you can ensure real-time updates of the conversation display. The code additions to achieve the same are as follows:
"use client";

+ import { useEffect, useState } from "react";
+ import { ConversationMessages } from "@/app/lib/chatCompletionModel";

export default function () {
+  const [latestMessage, setLatestMessage] = useState<string>("");
+  const [messages, setMessages] = useState<ConversationMessages>([]);

  const obtainAPIResponse = async (apiRoute: string, apiData: any) => {
    // Initiate the first call to connect to SSE API
    const apiResponse = await fetch(apiRoute, {
      method: "POST",
      headers: {
        "Content-Type": "text/event-stream",
      },
      body: JSON.stringify(apiData),
    });

    if (!apiResponse.body) return;

    // To decode incoming data as a string
    const reader = apiResponse.body
      .pipeThrough(new TextDecoderStream())
      .getReader();

+    let incomingMessage = "";

    while (true) {
      const { value, done } = await reader.read();
      if (done) {
+        // Insert the response received into the messages state
+        setMessages((messages) => [
+          ...messages,
+          { role: "assistant", content: incomingMessage },
+        ]);
+        // Reset the latest message's state received
+        setLatestMessage("");
        break;
      }
      if (value) {
+        // Append the incoming data to latest message's value
+        incomingMessage += value;
+        setLatestMessage(incomingMessage);
      }
    }
  };

  return <></>
}
The code additions above do the following:
- A state variable is declared to store the incoming data stream received from the SSE API.
- Upon receiving a complete message (indicated by
donebeing true), the latest received message is added to themessagesstate array. This message is formatted with a role of assistant to distinguish it from user messages. Also, the latest message state is reset to an empty string to prepare for the next incoming message. - As data is received incrementally (not yet forming a complete message), it is appended to the
incomingMessagevariable. - The latest message state is updated with the concatenated incoming data, ensuring real-time updates as new data arrives.
Great! With the reactive latestMessage and messages variables, you can now create dynamic user interfaces representing the messages exchanged in the conversation and the latest AI generated response.
That was a lot of learning! You’re all done now ✨
Deploy to Vercel
The repository is now ready to deploy to Vercel. Use the following steps to deploy:
- Start by creating a GitHub repository containing your app's code.
- Then, navigate to the Vercel Dashboard and create a New Project.
- Link the new project to the GitHub repository you have just created.
- In Settings, update the Environment Variables to match those in your local
.envfile. - Deploy! 🚀
More Information
For more detailed insights, explore the references cited in this post.